
 简体中文
简体中文 English
 عربى
عربى



Nine times out of ten, when a brushing line starts throwing streaks, shade variation or a limp hand, the brush itself is the last thing at fault. In the production problems we are asked to look at, the cause almost always sits in one of four places: how deep the brush engages the fabric, the ratio between brush surface speed and fabric speed, how much tension the cloth is under, and how well the dust extraction system is pulling lint away from the head. Get those four right and a brushing machine becomes one of the easiest pieces of finishing equipment in the plant to run. Ignore them and even a brand new brush will produce inconsistent work.
This guide is written for the people who actually set the machine: the finishing supervisor, the shift technician, the process engineer who has to write the recipe cards, and the buyer who has to specify equipment that will still make sense five years from now. It covers what brushing physically does to a fabric surface, the setup sequence from a cold start, realistic parameter ranges for common fabrics, the checks worth running, the defects that appear most often and how to correct them, and the maintenance and safety habits that keep a line productive.
The short version, before the detail. Brushing intensity is controlled by engagement depth and the brush-to-fabric speed ratio, not by pressure. Two light passes almost always beat one heavy pass. Tension should be the minimum that keeps the cloth flat. Dust extraction is not housekeeping; it is part of the process. And the only way to know a setting is correct is to run a measured leader, check it under proper light, and write the numbers down.
What a brushing machine actually does to a fabric surface
A brushing machine is not one process. It is three, and which one you are running depends entirely on how hard you set the brush against the cloth.
Cleaning. At low engagement, often a few tenths of a millimeter, the bristle tips sweep loose fiber, dust and surface debris off the cloth. On denim and heavy cotton this removes a surprising amount of lint and reduces the load carried into downstream processes. Cleaning passes are common before coating, laminating, printing, or immediately after drying and before rolling.
Raising, or napping. At higher engagement the filaments catch individual fibers and draw them up to the surface. The result is a nap, a pile, or a soft peach hand depending on fiber, twist and how the brush is driven. Direction and speed ratio decide whether you get an even, soft raise or a directional velvet effect.
Leveling and polishing. When the brush runs in the same direction as the fabric travel at a modest ratio, it lays fibers down and trims the tallest ones back, producing a smoother and slightly glossier surface. This is a finishing pass, not a raising pass, and it is used to tidy a surface that has already been raised elsewhere.
Understanding the mechanism explains most setting decisions. The amount of work done at the surface scales with two things: the relative speed between the bristle tips and the fiber, and the depth of engagement. Pressure is not a control variable, because the filament itself is the spring. Push a soft filament deeper and it simply bends further and strokes a longer arc, which may actually reduce the cutting action while increasing heat and fiber damage.
It is also worth being clear about what brushing cannot do. It does not bulk a fabric, shrink it, or soften yarn that is stiff because of residual sizing or poor relaxation. A cloth that feels boardy coming out of the dryer will still feel boardy after brushing; it will simply feel boardy with a nap on it. Brushing is a surface treatment, and its benefits are mostly in how the fabric looks, feels under the hand, and behaves in the next process. That is a real benefit, and it is why the operation exists, but it is a narrow one and it should be sold internally as such.
Finally, brushing is partly reversible. Fibers laid down by one pass can be lifted again by another, and a brushed surface can be flattened by compression in a roll stack, by excessive tension, or by being rolled up warm. Sueding, in contrast, cuts fiber ends with an abrasive surface and creates a much more permanent change. Keeping that distinction in mind prevents a lot of wasted trial time.
Match the brush and the head to the fabric before touching a dial
Two machines with identical drums and motors will behave completely differently if the brush specification, head geometry or rotation pattern differs. This is why copying a competitor's recipe rarely works, and why the recipe card should record the brush as carefully as it records speed.
Brush filament. Standard nylon is the general-purpose choice: soft, resilient, and unlikely to damage a delicate knit or a fine woven. Abrasive-loaded nylon, where silicon carbide or aluminium oxide is embedded in the filament, raises fiber far more aggressively and is used for fleece, velour, upholstery and napping work. Wire brushes belong to heavy-duty cleaning and to some leather and carpet applications, and they should never be considered interchangeable with nylon. Filament diameter determines how "sharp" the action feels: 0.15 to 0.25 mm is fine work, 0.30 to 0.45 mm is general purpose, and 0.50 to 0.60 mm is heavy raising.
Brush length and density. Longer filaments bend more easily and produce a gentler, more forgiving stroke. Denser tufting does more work per revolution and generates more heat. After a brush has been in service for a while, filament length shortens and the effective engagement changes, which is one reason a recipe that worked in January can drift by spring.
Head geometry. A drum head with a single large roller suits woven goods running under tension, where the fabric can be held flat and the contact line is stable. A planetary head, where several smaller brush rollers orbit around a central axis, contacts the cloth along many short paths instead of one long line. That design follows the irregular surface of a knit far better, reduces needle-line opening, and spreads wear across more brushing surface. Plants running cotton interlock, jersey and fleece often find that a planetary head gives a more even raise with less risk to the fabric structure, which is exactly what equipment such as a dedicated planetary brushing machine for knits is built to do.
Number of heads. Multi-head machines let you split the work: two or three light passes across separate heads gives a more uniform result than one aggressive pass on a single head, because each pass removes only a modest amount of fiber and the fabric has a chance to recover flat between contacts.
The practical rule is simple. Decide the fabric family first, then the brush, then the head configuration, and only then start tuning speed and engagement. Reversing that order, which happens constantly on the shop floor, is the main reason trial runs take three days instead of three hours.
The setup sequence from a cold start
Sequence matters. Doing these steps in a different order is how a machine gets set to a "wrong" zero and every subsequent adjustment is made against a bad reference.
- Confirm the recipe and the brush. Check that the mounted brush matches the recipe card, that it is the right filament type and diameter, and that it has not been swapped between shifts. Record the brush identification number.
- Inspect the brush itself. Run the machine slowly with the fabric out and the guards in place. Look for flat spots, bent or missing tufts, out-of-round sections, and uneven bristle length. A brush that is 1 mm out of round will produce a banded pattern that no speed setting can hide.
- Clean the extraction path. Empty or clean filters, check ducting joints, and confirm the suction is actually reaching the hood at the head. Brushing produces more airborne lint than most operators expect, and a partly blocked duct changes the surface result as well as the working environment.
- Thread the fabric at minimum tension. Establish correct selvedge alignment and width before applying any working tension. If the fabric is skewed or has a slack selvedge, fix it here rather than trying to compensate with the brush.
- Set the engagement reference. Bring the brush to the cloth until contact is just perceptible, then zero the indicator or record the digital value. All later adjustments are made relative to that contact point, not to the machine's mechanical stop.
- Bring the brush up to speed with the fabric already running. Start the fabric drive first, then the brush drive. On a stopped fabric a brush can mark the surface within a second or two.
- Run a measured leader. Thirty meters is usually enough. Mark the start and finish, then inspect mid-width and both selvedges separately rather than looking only at the center.
- Lock and log. Once the setting passes, record engagement, brush speed, fabric speed, tension, and the extraction damper position. Set a reasonable tolerance window so the next shift knows how far it may drift without raising a deviation.
One habit is worth building early: always approach the final engagement depth from the same direction. If the operator sometimes comes down from a heavy setting and sometimes up from contact, the mechanical backlash in a typical adjusting screw can be several tenths of a millimeter, which is enough to shift a result from acceptable to rejected.
The settings that decide what comes off the machine
The ranges below reflect common industrial practice. They are starting points, not specifications. Every fabric, dye lot and machine will shift them, and the correct approach is always to start at the low end of the range and work upward in small increments.
| Fabric | Brush filament | Engagement | Brush to fabric ratio | Passes | Main risk |
|---|---|---|---|---|---|
| Cotton sheeting, poplin | Nylon 0.20 to 0.30 mm | 0.3 to 0.6 mm | 3:1 to 5:1 | 1 | Shade lightening on dark dye lots |
| Cotton interlock, jersey | Nylon 0.20 to 0.35 mm | 0.4 to 0.8 mm | 2:1 to 4:1 | 1 to 2 | Edge curl and needle-line opening |
| Fleece and brushed-back knit | Abrasive nylon 0.30 to 0.45 mm | 1.0 to 2.0 mm | 4:1 to 8:1 | 1 to 2 | Patchy pile if tension varies |
| Denim, 10 to 14 oz | Abrasive nylon 0.45 to 0.60 mm | 0.8 to 1.5 mm | 4:1 to 7:1 | 1 | Heavy lint load in filters |
| Polyester woven | Nylon 0.25 to 0.40 mm | 0.4 to 0.9 mm | 3:1 to 6:1 | 1 | Static and filament fusing at high speed |
| Velour, upholstery | Abrasive nylon 0.40 to 0.60 mm | 1.5 to 3.0 mm | 5:1 to 10:1 | 1 to 2 | Pile crush if rolled warm |
| Synthetic leather, microfiber | Fine nylon 0.15 to 0.25 mm | 0.2 to 0.5 mm | 2:1 to 4:1 | 1 to 2 | Heat and gloss marks |
Two things in that table deserve emphasis. First, the brush-to-fabric ratio is a ratio, not a fixed speed. On a machine running cloth at 20 m/min, a brush surface speed of 120 m/min gives a ratio of 6:1. If the line speed is later doubled to improve output, the ratio collapses to 3:1 and the surface changes, even though nobody touched the brush settings. Whenever line speed changes, the brush speed must be recalculated, which is why inverter control with a linked recipe is worth far more than a bigger motor.
Second, engagement is the setting that most directly affects fabric integrity. Doubling engagement roughly doubles the work done at the surface, but it also increases the bending stress on the filaments and the heat generated at the contact line. Deep settings that run hot will glaze a thermoplastic surface long before they produce a better raise.
Rotation direction, multi-head layout and the two-pass rule
Direction is the most underused control on a brushing machine. Running the brush counter to the fabric travel means the bristle tips meet the fibers head-on; the relative speed is the sum of the two surface speeds, and the action is aggressive, raising and slightly roughening. Running the brush with the fabric travel means the tips sweep along the fibers; relative speed is the difference, and the action is gentle, leveling and slightly polishing.
Most raising recipes use counter-rotation on the first head or first pair of heads, followed by a with-rotation head to lay the raised fibers into a clean, uniform direction. That combination is what produces the characteristic soft, even nap on a good fleece or a well-finished velour, and it is far more controllable than trying to achieve the same result with a single head at an extreme setting.
The two-pass rule follows from the same logic. Because the work done at the surface is not perfectly uniform, a single heavy pass tends to amplify local variation: a slightly thicker place in the fabric gets brushed harder, a looser place gets brushed less, and the result is a visible pattern. Two lighter passes average that variation out. If a fabric needs to lose more than about 3 to 4 percent of its weight to reach the target hand, that is usually a sign that the process should be split, or that a sueding step belongs in the line.
Watch for a subtler effect on multi-head machines: heat accumulation. Three heads running at high ratio in an enclosed frame can raise the local temperature at the contact line by a noticeable margin, and on polyester or polypropylene this shows up as small glossy spots or fused fiber tips. If the surface looks bright and glassy rather than softly raised, reduce ratio before reducing engagement.
Tension, width control, selvedges and seams
Tension exists to keep the cloth flat, not to hold it still. A brushing machine wants the minimum tension that removes wrinkles and holds the selvedges in the guides. Over-tensioned fabric is stretched flat under the brush and then relaxes when the tension comes off, so the nap appears to change the moment the cloth leaves the machine. Over-tensioning also accelerates needle-line opening in knits and can permanently distort a light woven.
Under-tensioning is worse in the short term. Slack cloth lifts into the brush, wrinkles pass under the contact line and get printed into the surface as crease marks that cannot be brushed out, and in severe cases the fabric can wrap a roller. The correct tension is usually the lowest value at which the cloth sits flat across the full width with no visible vibration as it enters the head.
Selvedges need separate attention. The two outer centimeters of a roll are frequently the first place to show a problem, because they see different tension and are most exposed to edge curl after brushing. If the selvedge begins to curl, check the fabric temperature and the tension before adjusting the brush; a warm, over-tensioned edge will curl no matter what the brush does. Curled edges also cause trouble at the winder, where the roll profile becomes uneven and the next process suffers.
Seams are where most machine damage happens. A sewn join with a thick, hard fold should be run through slowly, with the brush lifted or the gap opened, and it should never be allowed to pass at production speed if the seam is bulky. Operators who develop the habit of marking every seam and slowing at the join prevent a large share of the holes, tears and brush damage that show up as mysterious quality problems weeks later.
Dust extraction, lint load and fire risk
Extraction is the part of the process most likely to be neglected and the part most likely to cause a serious incident. A brushing machine generates a continuous stream of short fiber, dust and, on some fabrics, fine particulate that is combustible when it accumulates in the right concentration and meets a hot surface or a spark.
Three things follow from that. First, the extraction hood should be positioned so that lint is captured at the point of generation, before it escapes into the room, which means the hood design and airflow have to match the head geometry rather than being bolted on afterwards. Second, filters need a defined cleaning interval based on measured pressure drop, not on how the room looks. Third, ducting should be bonded and grounded, with no long horizontal runs where fiber can settle and accumulate.
Process quality and safety are the same issue here. If the extraction is weak, lint re-deposits on the cloth after brushing, the surface looks speckled under inspection light, the filters load faster, and the operator compensates by turning up the brush, which generates more lint. Installing a purpose-built automated dust extraction system and running it to a measured pressure drop removes that loop entirely, and it typically pays back through reduced cleaning downtime long before anyone counts the fire risk.
A simple working rule: check the manometer at the start of every shift and record it. When the pressure drop rises beyond the band recorded at commissioning, clean the filters. If the operator cannot tell whether extraction is working, extraction is not being managed.
Reading the first trial run in thirty meters
A structured trial takes about twenty minutes and saves days of argument. The protocol below is what a disciplined finishing room uses.
- Run at the low end of the target engagement and record the exact value.
- Collect a sample at the start of the leader, then a second sample after at least twenty meters, so the result reflects a settled machine rather than a cold start.
- Inspect each sample at three points across the width: left selvedge plus ten centimeters, center, and right selvedge plus ten centimeters. Brushing problems are frequently asymmetric, and a center-only check will miss them.
- Assess under standardized lighting, ideally the same illumination the customer will use to judge the goods. Surface effects that look perfect under a single overhead lamp can look striped under a different color temperature.
- Weigh the samples. A simple mass per unit area comparison before and after brushing tells you how much fiber the process is actually removing, and it is a far more reliable record than a verbal note that the hand "felt right".
- Wash and tumble one sample before final approval if the fabric will be laundered by the end user. Some naps look excellent in the greige and collapse after the first wash.
- Increase engagement in small steps and repeat until either the target hand is reached or a limit is hit. Stop at the first sign of shade change, surface glazing or weight loss beyond the agreed allowance.
Write the final numbers on the recipe card and photograph the approved sample. A physical reference swatch kept at the machine is worth more than any spreadsheet, because it settles disputes about hand and shade in seconds.
Quality checks that keep the line honest
Routine checks are what stop a slow drift from becoming a rejected order. The table below is a practical minimum for a plant running brushing on a regular basis.
| Check | Method | Frequency | Act if |
|---|---|---|---|
| Nap and pile uniformity | Visual comparison against approved swatch under standard light, at three points across width | Every roll | Any banding, streak or width variation is visible |
| Weight loss | Sample weigh-in before and after brushing, expressed as a percentage | Start and mid-run of each order | Loss exceeds the order allowance |
| Shade | Spectrophotometer against the approved standard, plus visual check | Every roll on shade-critical orders | Color difference beyond the agreed tolerance |
| Strength retention | Tensile and tear test on brushed versus unbrushed samples | Once per order, or after any parameter change | Loss exceeds customer specification |
| Pilling and abrasion | Martindale or equivalent on a washed sample | First order of a new construction | Rating falls below the agreed level |
| Hand assessment | Small panel, blind comparison against the reference swatch | Each new recipe | Panel disagrees with the reference |
| Residual lint | Dark cloth wipe or tape test on the outgoing surface | Every shift | Visible fiber transfer on the wipe |
The most useful of these is the weight loss figure, because it converts a subjective judgement into a number that can be trended. Once a plant knows that its accepted velour hand corresponds to a 3 percent weight loss on a particular construction, the operator has an objective target and maintenance has a way to detect a wearing brush before the customer does.
Brushing and sueding: how the two steps work together
Brushing and sueding are often discussed as if they were alternatives. In practice, most soft-hand finishing lines use them together, and understanding the division of labour makes both operations easier to control.
Brushing moves fibers. It rearranges what is already there, lifts loose material, and cleans the surface. Sueding cuts fibers. An abrasive roller or belt shears fiber ends and creates a short, dense, permanent peach-skin effect that survives washing and wear far better than a purely brushed surface. If the target hand requires that the fabric feel soft after five home launderings rather than only when it leaves the stenter, sueding is usually doing the heavy lifting and brushing is refining the result.
A common order of operations is: pre-clean with a light brushing pass, suede to build the surface, then brush again to lift and align the fiber so the finish looks even rather than flat. On woven cotton and denim, a horizontal combined sueding machine is the workhorse that follows this pattern, with the brushing head or a separate brushing unit cleaning the surface after the abrasive contact. Woven structures with a stable, low-stretch construction handle relatively deep abrasive contact without distortion, which is why equipment such as a 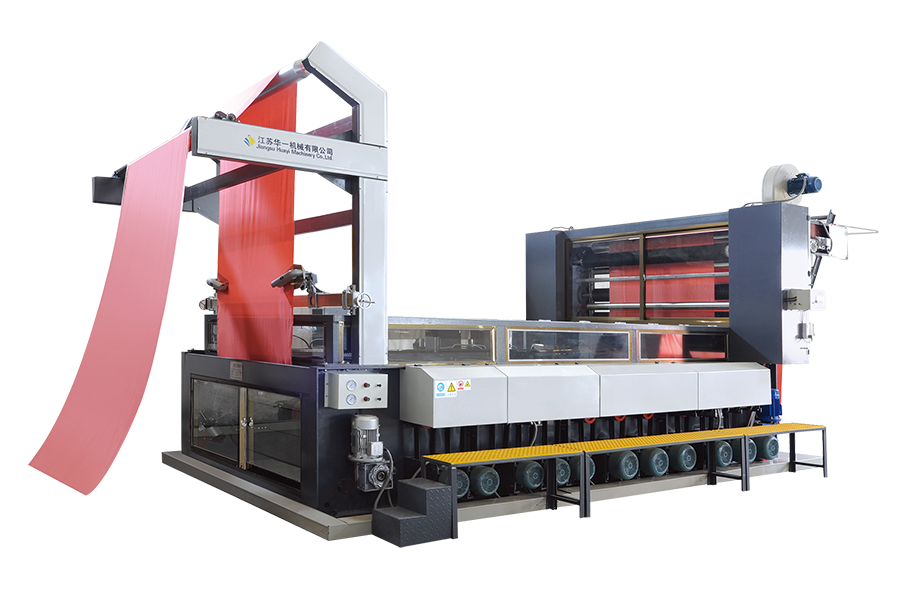 Horizontal Combined Sueding Machine MW-ModelIn a sueding-then-brushing finishing sequence, the MW-Model supports sandpaper, carbon fiber, and ceramic fiber abrasives with independent roller drives for consistent surface preparation.View Product → horizontal combined sueding machine of this type is usually specified alongside a brushing unit rather than instead of one.
The diagnostic value of the two operations is worth noting. If a fabric looks patchy after sueding, the cause is usually abrasive contact or tension. If it looks patchy after brushing, the cause is more often brush condition or extraction. Since the two machines sit next to each other, an operator who can tell which stage introduced a defect saves a great deal of troubleshooting time.
Common brushing defects and how to correct them
Most problems on a brushing line fall into a small number of recognizable patterns. The table below maps the symptom to the most probable cause and the first corrective action, in the order a technician should work through them.
| Defect | Likely cause | What to change first |
|---|---|---|
| Streaks or bands along the length | Brush out of round, flat spot, or uneven bristle length | Inspect and true the brush; check filament condition before altering speed |
| Uneven result across the width | Brush axis not parallel to the fabric path, or tension higher on one selvedge | Measure gap at both ends; check guide alignment and selvedge tension |
| Holes, thin places, needle-line opening | Engagement too deep, or fabric stressed beyond its construction limits | Reduce engagement and switch to two light passes |
| Shade change, surface looks lighter | Excessive fiber removal, especially on dark dye lots | Reduce ratio, then engagement; sample weigh-in to confirm loss |
| Glossy spots or fused tips | Heat from high ratio at the contact line, common on synthetics | Lower brush speed while holding fabric speed; verify extraction airflow |
| Crease marks printed into the surface | Fabric slack at the head, or a wrinkle passed under the brush | Raise tension to the minimum flat setting; check for a slack selvedge |
| Speckled surface with lint transfer | Extraction not capturing at the hood, or filters loaded | Check pressure drop and hood position before touching brush settings |
| Edge curl after brushing | Warm, over-tensioned selvedge relaxing after the head | Lower tension and check fabric temperature on exit |
A useful discipline when a defect appears is to change one variable at a time and re-sample after twenty meters. Brushing is a system, and adjusting three settings at once leaves nobody able to say which one fixed the problem, or which one caused the next one.
Brush care and machine maintenance
The brush is a consumable, but it is an expensive one, and how it is treated determines both the surface result and how often it has to be replaced. A few routines cover most of what matters.
- Daily. Inspect the brush visually with the machine isolated. Look for embedded debris, wrapped threads and obvious tuft damage, and record extraction pressure drop before the first roll.
- Weekly. Check the gap or engagement indicator against a reference setting, verify that the adjusting mechanism returns consistently, and confirm the brush runs true with no visible vibration.
- Monthly. Lubricate bearings to the manufacturer's schedule, check drive belt tension, and inspect ducting joints for leaks or accumulated fiber.
- By measurement, not by calendar. Measure filament length at several points around the brush and replace when the working length falls outside the band that the recipe was developed on. A worn brush changes the effective engagement even when the dial reads the same.
- After any brush change. Re-establish the contact reference, run a fresh leader, and update the recipe card with the new brush identification number. Never assume a replaced brush will reproduce the previous result.
- Seasonally. Review the machine as a whole, including guards, interlocks, emergency stops and extraction hood condition. A brushing machine that has run hard for six months will usually show some drift in roller parallelism that only shows up as a subtle width variation in the finished goods.
One further point about spare parts. Because the filament specification affects the result so strongly, brushes should be bought against a written specification and an approved sample, not simply reordered from a stock number. A supplier substitution of a slightly different filament diameter can invalidate a recipe that took a week to develop.
Safety practice on a brushing line
Brushing machines have an obvious and unforgiving hazard: the nip between the brush and the cloth path. Filaments are flexible, which encourages a false sense of security, but a rotating brush will pull a glove, a sleeve or a finger into the contact line within milliseconds, and the machine will not stop because it has detected a hand.
- Never reach into the head area while the brush is turning, even at the lowest speed and even to remove a thread. Isolate first.
- Use lock-out and tag-out for brush changes, cleaning and jam clearing, with a personal lock rather than a shared key.
- Keep guards and interlocks in place and functional. If an interlock has been bypassed to keep production running, treat that as a reportable defect rather than an operational convenience.
- Control dust as a health and fire measure, and prohibit dry sweeping in the machine area, which re-suspends settled fiber.
- Train operators on emergency stop locations, extraction shutdown, and the specific fire response procedure for combustible textile dust.
- Provide hearing protection where extraction fans and drive noise warrant it, and check levels after any change to the extraction system, since a more powerful fan is also a louder one.
Safety instruction that is written once and filed is worth nothing. Short, frequent conversations at the machine, tied to real events such as a thread wrap or a near miss, are what keep the habits in place.
Specifying a brushing machine: what to put in the enquiry
Buying decisions on brushing equipment go wrong for a predictable reason: the enquiry lists a width and a speed and nothing else. The machine that arrives then handles the widest, easiest fabric in the range and struggles with everything else. A complete enquiry answers the following.
- The fabric range. Fiber content, construction, weight in grams per square meter, and whether goods are woven, knit or nonwoven. Include the lightest and heaviest articles, not the average.
- The target effect. Cleaning only, napping, polishing, or a combination. Describe the hand in words and attach a physical reference swatch if possible.
- Line speed and width requirements, with the fabric speed range the machine must cover and the brush speed range that goes with it. Insist on independently controlled brush and fabric drives, since a fixed ratio between them will limit the recipe range from day one.
- Extraction expectations. Air volume, hood design, filtration and whether the extraction is integrated or supplied separately.
- Changeover time. How long a brush change or a recipe change takes matters more than the machine's peak speed on short orders.
- Service and spares. Brush availability, filament specification documentation, and the response commitment for technical support in your region.
For plants running fine knits and delicate wovens at speed, a modern high-speed brushing unit with inverter-controlled brush and fabric drives, quick brush changeover and integrated extraction covers most of the requirements in one frame. A machine built to that specification, of the type represented by a 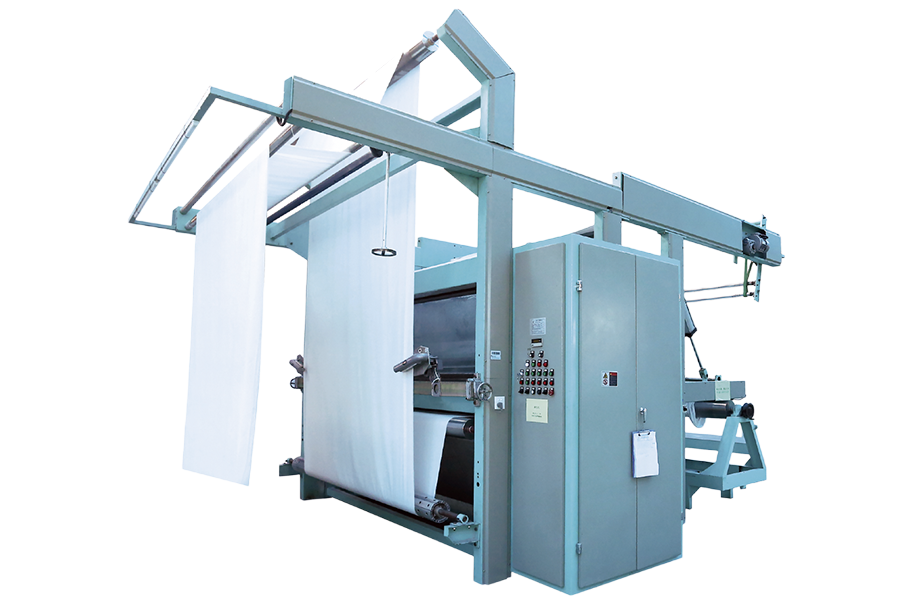 High Speed Brushing Machine VX7For fine knits and delicate wovens, the compact VX7 uses seven carbon-ceramic brush rollers and high-speed operation for flexible cleaning and finishing passes.View Product → high-speed brushing machine in this class, allows the operator to move between a light cleaning pass and a full napping pass without changing hardware, which is exactly the flexibility that short-order finishing work demands.
Whatever machine is chosen, insist on a factory acceptance run on your own fabric before shipment, and record the settings used. That single step converts a specification into a working recipe and removes most of the risk from the installation period.
Where brushing fits in the finishing train
Brushing rarely stands alone. It sits between mechanical surface treatment and the steps that set the final hand, and its output is only as good as what the upstream and downstream processes allow.
Upstream, the fabric should be clean, dry and relaxed. Brushing a fabric that is carrying residual sizing, or that is still hot from a dryer, produces variable results because the fiber behaves differently when it is warm and slightly plastic. Downstream, whatever raise the brush has created has to survive the rest of the line. That means avoiding unnecessary compression in a calendar or a roll stack, controlling wind-up tension, and allowing the fabric to cool before it is rolled.
Where a softer, fuller hand is required than brushing alone can deliver, mechanical surface treatment is usually followed by an air-based softening step that works the fabric in a relaxed state rather than pressing or tensioning it. Air softening and brushing complement each other well: the brush controls the surface, and mechanical softening in an open-width air flow controls the body, drape and residual stiffness. Equipment such as an 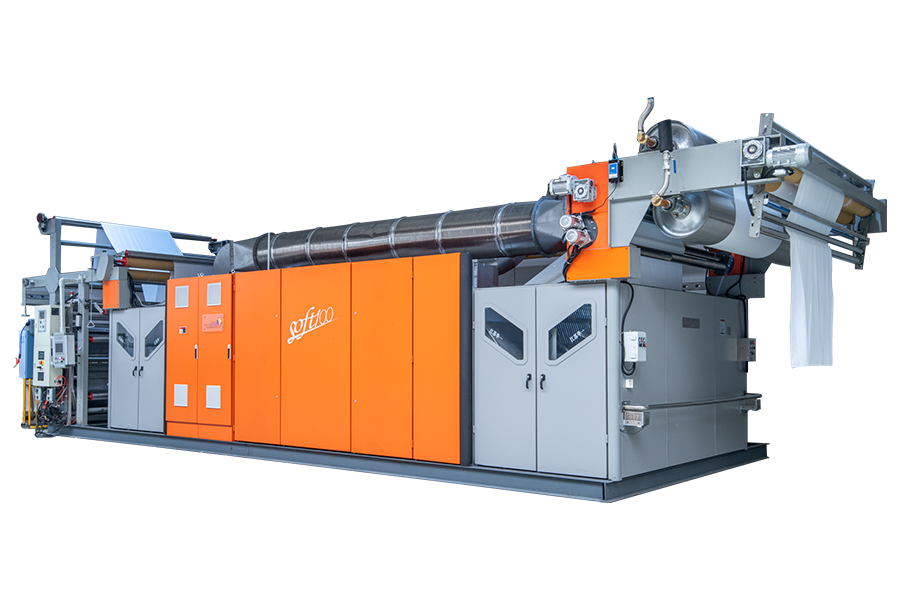 Open-width Air Softening Machine SOFT100Placed after surface treatment and before drying, the SOFT100 uses a six-meter Venturi tube to soften knits, wovens, towels, and Tencel in open width.View Product → open-width air softening machine belongs in that position in the finishing sequence, after the surface has been established and before the final drying and rolling steps.
Getting the sequence right is often more valuable than getting any single machine perfect. A line whose brushing, sueding and softening steps are correctly ordered will produce a better hand from average settings than a line with excellent equipment arranged in the wrong order.
If there is one conclusion to take from all of this, it is that brushing rewards discipline far more than it rewards force. The machine has a small number of real controls, engagement, ratio, tension, direction, extraction, and each of them has a narrow band in which the result is good and a wide band in which the result is merely different. Operators who understand what each control actually does to the fiber spend their time measuring, sampling and writing down numbers. Operators who treat the machine as a single intensity dial spend their time fighting defects that reappear a shift later.
The practical sequence is always the same. Match the brush and head to the fabric. Establish a clean contact reference. Run light, measure the result across the width, and adjust one variable at a time. Watch weight loss and shade as objective indicators rather than relying on the hand alone. Keep extraction working to a measured pressure drop. Maintain and measure the brush instead of replacing it on a calendar. Then write the final recipe down and keep an approved swatch at the machine so that the standard survives beyond the person who set it.
Brushing is a mature technology and one of the least expensive ways to change how a fabric reads to a customer, whether that means a cleaner surface, a fuller nap or a softer hand. The equipment, whether a single-head cleaning unit or a multi-head planetary brushing line, will do exactly what it is set to do. The value is created or lost in the setting, and that part is entirely in the hands of the people running the line.